
How to Install a Water Softener Yourself (Even If You’re Not a Plumber)
Key Takeaways
- Most homeowners can install a water softener in about two to four hours.
- Careful preparation is more important than advanced plumbing experience.
- Choosing the right location can help improve efficiency and simplify maintenance.
- Water softeners require connections to the water supply, drain line, and power source.
- Checking for leaks and programming the control valve correctly are essential final steps.
- Compact systems designed specifically for DIY installation can make the process much easier.
Can You Really Install a Water Softener Yourself?
Many homeowners assume that installing a water softener requires a professional plumber. In reality, many modern systems are designed with do-it-yourself installation in mind. If you’re comfortable using basic hand tools, following directions, and setting aside an afternoon for the project, installing a water softener may be easier than you think.
The growing popularity of DIY home improvement projects has made straightforward installation an increasingly important feature for homeowners, especially those looking for a compact system that fits comfortably into smaller utility spaces.
What You’ll Need
Before you begin, gather the following tools and materials:
- Adjustable wrench
- Pipe cutter
- Screwdrivers
- Teflon tape
- Flexible water supply lines
- Bucket and towels
- Drain tubing
- Bypass valve
- Water hardness test kit
- Safety glasses and gloves
Step 1: Turn Off the Water Supply
Locate your home’s main water shutoff valve and turn it off completely. Open a nearby faucet to relieve pressure and drain any remaining water from the pipes.
Step 2: Choose the Right Installation Location
Your water softener should be positioned:
- Near the main water line
- Close to a drain
- Within reach of a grounded electrical outlet
- In an area protected from freezing temperatures
- In a location that allows easy access for adding salt
Step 3: Cut the Main Water Line
Carefully measure the section of pipe where the bypass valve and softener connections will be installed. Make clean, square cuts to help ensure leak-free connections.
Step 4: Install the Bypass Valve
Most modern water softeners include a bypass valve that allows you to direct water around the system during maintenance.
Follow the manufacturer’s instructions carefully and make sure the valve orientation matches the direction of water flow.
Step 5: Connect the Inlet and Outlet Lines
Connect the household plumbing lines to the water softener’s inlet and outlet ports. Tighten all fittings securely, but avoid overtightening them.
A small amount of Teflon tape on threaded fittings can help prevent leaks.
Step 6: Attach the Drain Line
The drain line carries wastewater away during regeneration cycles.
Common drain locations include:
- Floor drains
- Utility sinks
- Standpipes
- Laundry drains
Make sure the tubing is secured and free from sharp bends.
Step 7: Connect the Power Supply
Plug the water softener into a grounded electrical outlet. Avoid extension cords whenever possible.
Step 8: Add Water and Check for Leaks
Slowly open the bypass valve and restore the main water supply. Inspect every connection carefully.
If you notice any leaks, turn off the water supply and tighten the appropriate fittings.
Step 9: Program the System
Enter your settings according to the owner’s manual, including:
- Water hardness level
- Household size
- Regeneration schedule
- Time and date
These settings help maximize efficiency while reducing salt and water consumption.
Step 10: Run the First Regeneration Cycle
Your system’s initial regeneration cycle prepares the resin bed and verifies that everything is operating correctly.
Once the cycle is complete, your household can begin enjoying the benefits of softened water.
Common DIY Installation Mistakes to Avoid
Even experienced homeowners can run into problems. Here are a few mistakes to avoid:
- Choosing an installation location without adequate clearance
- Forgetting to install the bypass valve
- Routing the drain line incorrectly
- Skipping leak inspections
- Entering inaccurate hardness settings
- Ignoring local plumbing codes
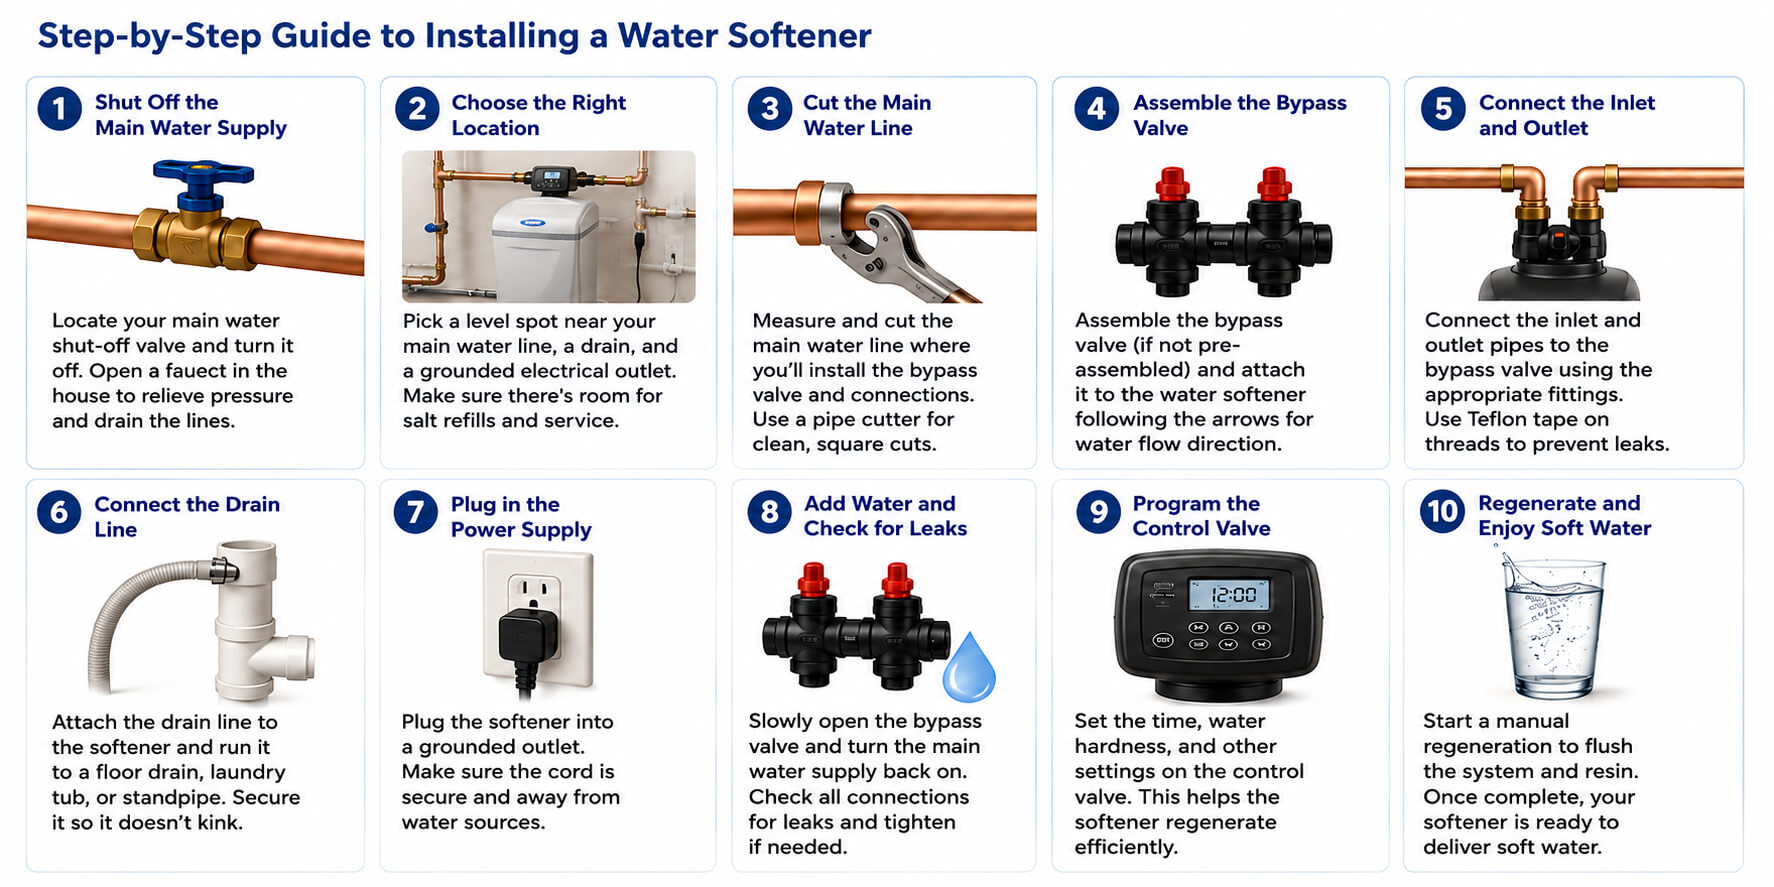
Step-by-Step Installation Visual Guide
The following WaterBoss visual was created specifically to accompany this installation guide and provide a quick, easy-to-follow reference for homeowners.
Why WaterBoss Systems Are Designed for DIY Homeowners
WaterBoss knows that homeowners want equipment that is efficient, dependable, and easy to install. That is why our systems are designed with compact footprints, straightforward controls, and detailed instructions.
Our smaller design makes WaterBoss water softeners especially useful in utility closets, garages, and other locations where traditional systems may be difficult to fit. This focus on simplicity and efficiency continues to make WaterBoss a popular choice among homeowners looking for a practical do-it-yourself solution.
Ready to Get Started?
Installing a water softener yourself can save money, improve water quality, and help protect your appliances for years to come.
If you would like help choosing the right system for your home, find your local WaterBoss retailer today.